
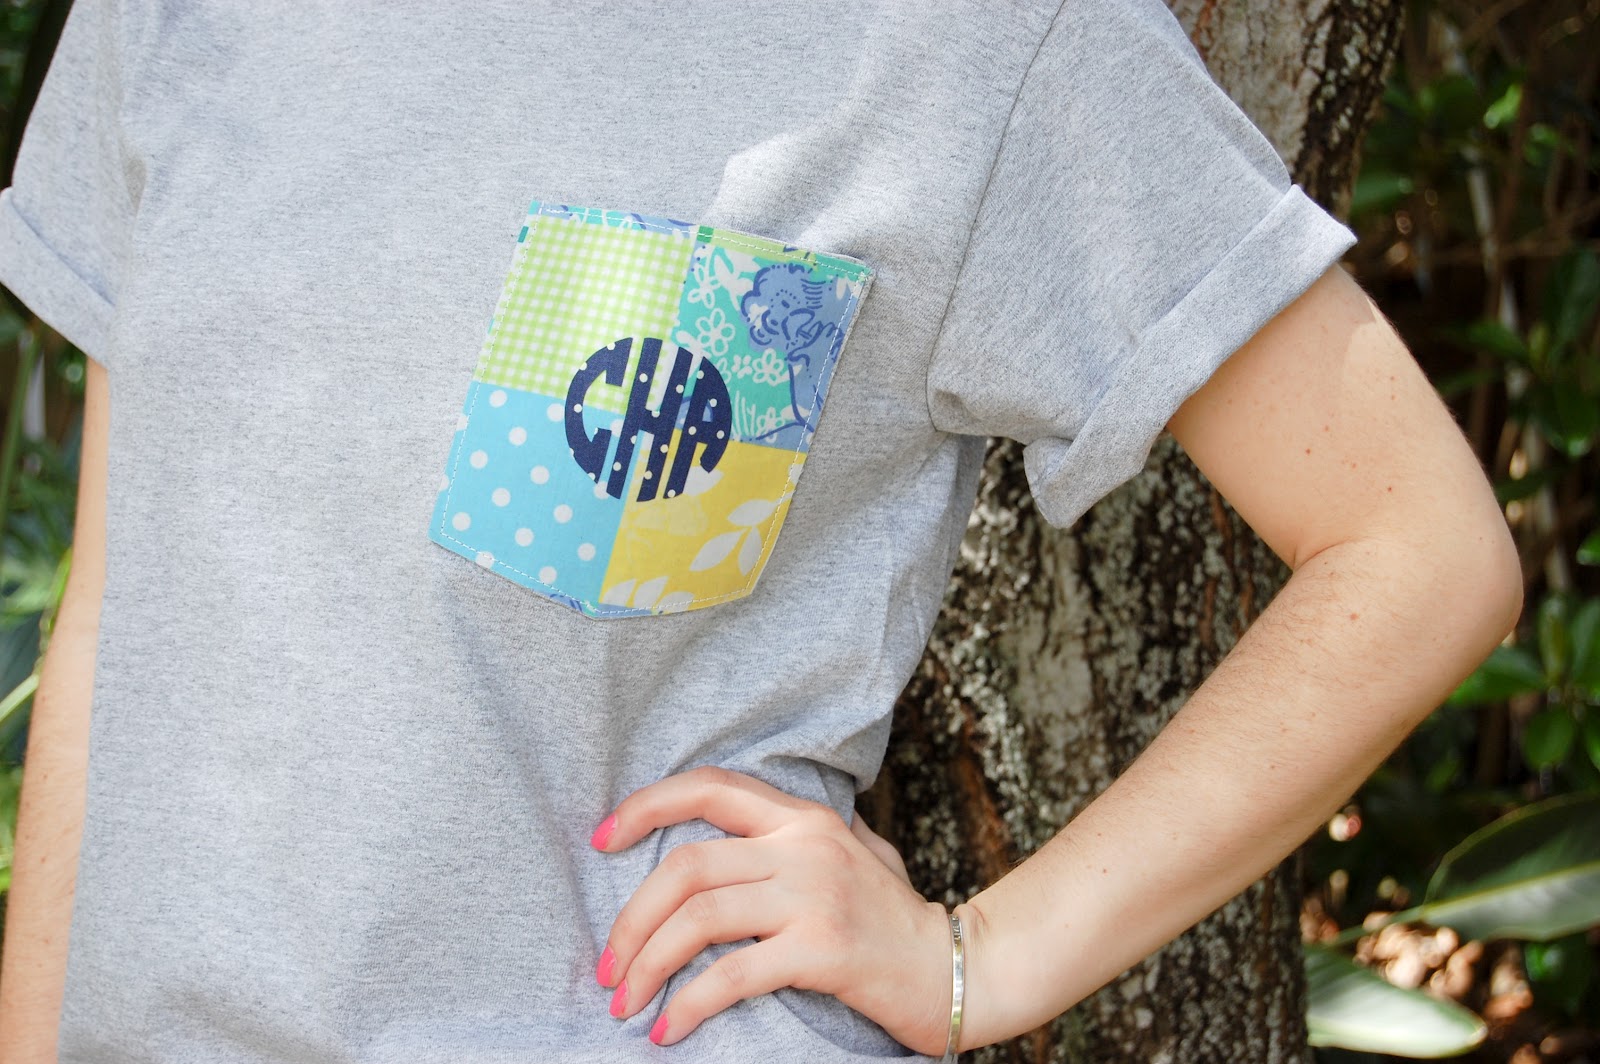
I am in love with my t-shirt from The Frat Collection. I wear it basically every chance I get. (That is to say, the first day it’s out of the wash I’m wearing it…) I’m really not a t-shirt kind of person, which is why I think I like it so much. When I’m running errands or babysitting a bunch of crazy kids, it’s the perfect thing to throw on and feel (at least a little bit) put together while still maintaining the comfort of a plain t-shirt.
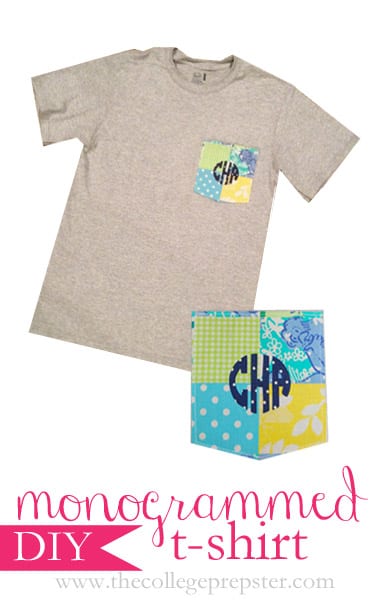
I was inspired by The Frat Collection and monogrammed embroidered t-shirts I saw on Etsy (like these) to create my own. Considering that I do not have an embroidery machine, although I would love one, I had to improvise a way to make my own version. Here’s what I came up with!
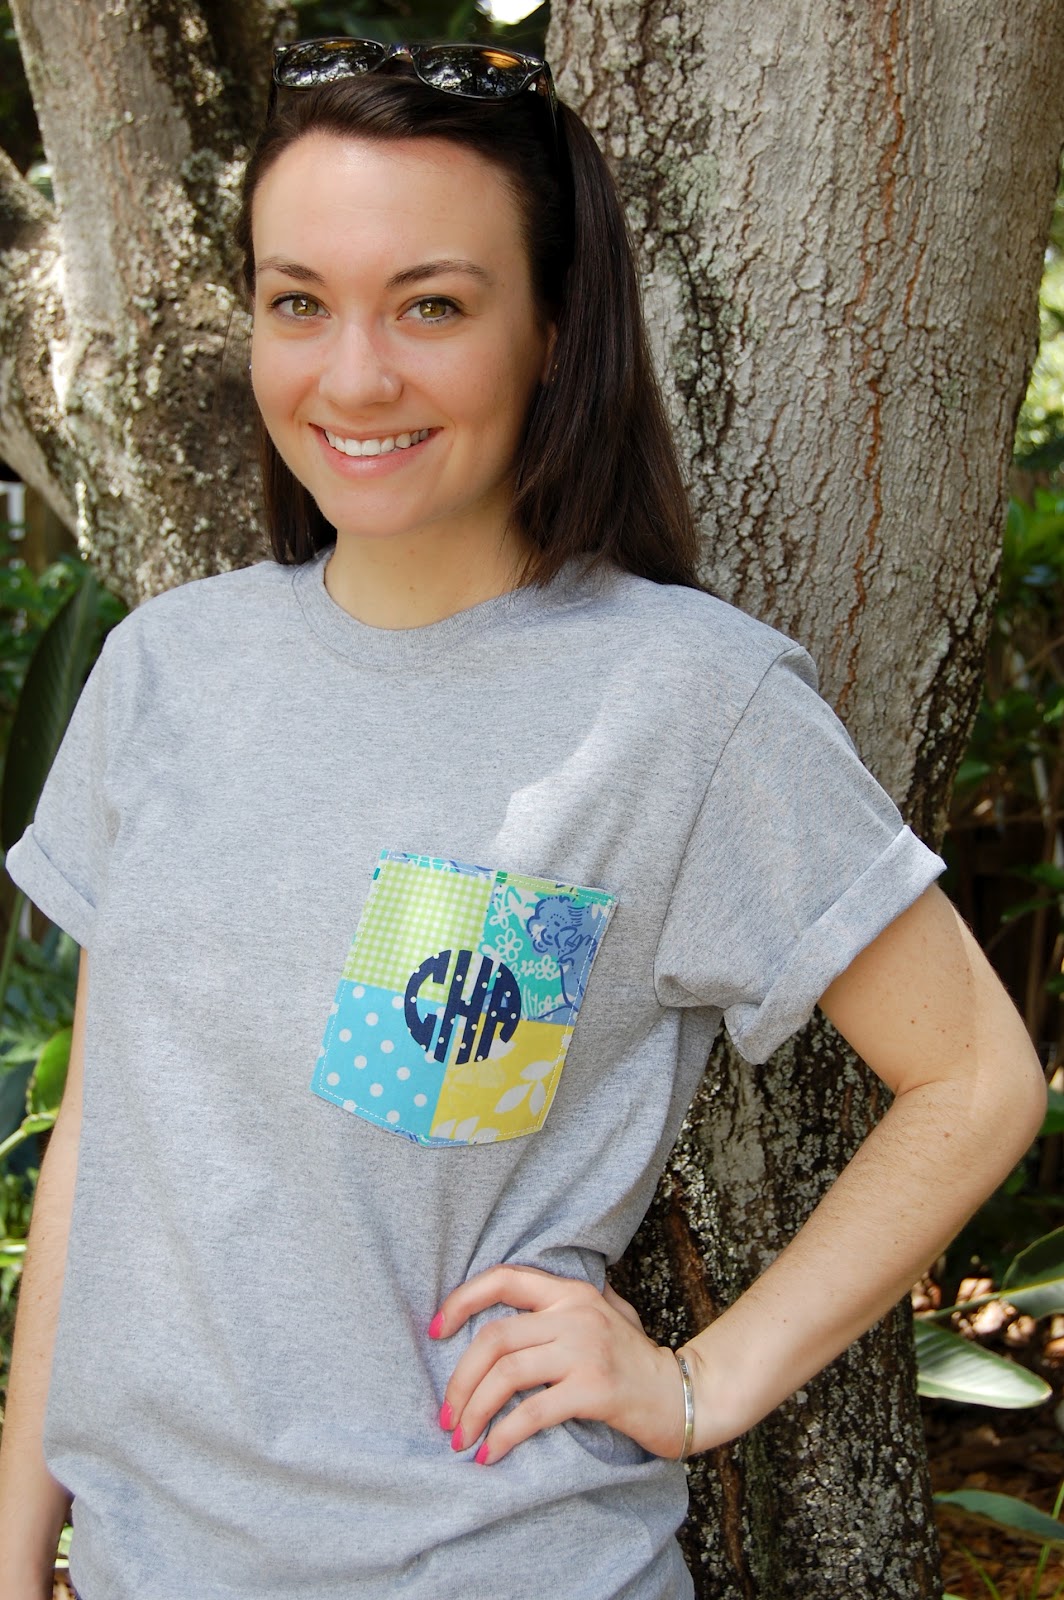
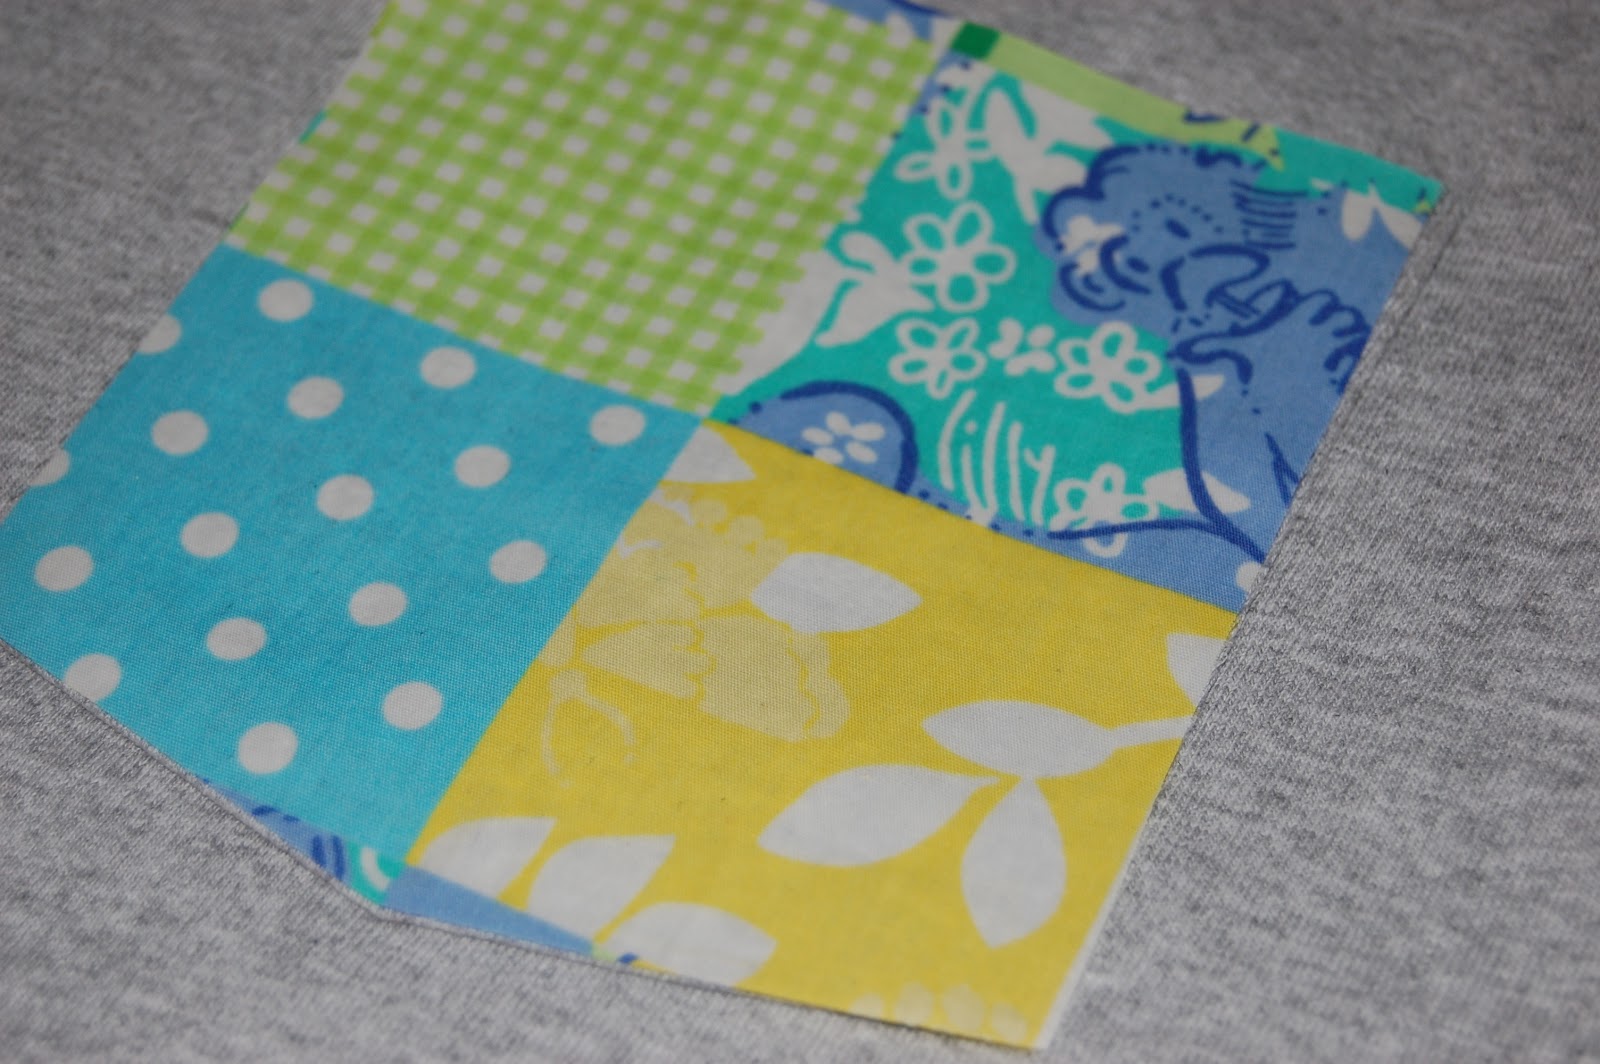
I have quite a large collection of Lilly fabric from past projects. I really wanted to make a Lilly pocket. And I found a scrap of polka dot fabric in the Ladies Lounge that made the perfect monogram!
Want to make your own? This is surprisingly an easier project than it looks! All it takes is a little patience and elbow grease. Here is what you will need:
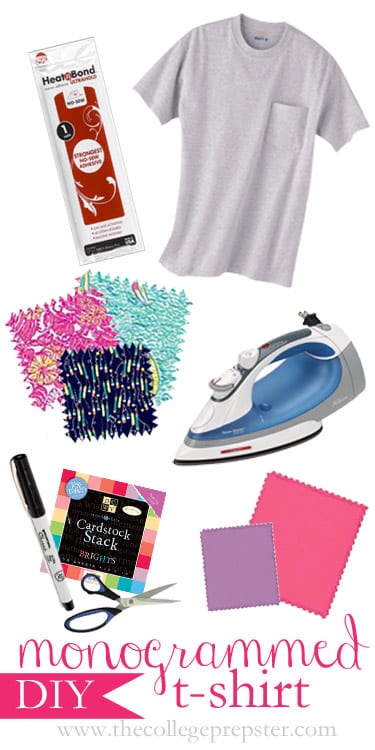
Iron On Adhesive | I used “Heat n Bond” Ultra Hold
Pocket T-Shirt | I used a Fruit of the Loom Pocket Tee
Patterned Fabric | I used leftover Lilly fabric, which was cut from old dresses
Iron | Make sure you turn your steam setting off if applicable
Cardstock, Sharpie, & Scissors | This is used to make templates!
Solid Fabric | To complement your patterned fabric
I’m going to do my best to explain how I made the fabric appliques for the pocket and monogram… but in case I don’t make sense (which is highly likely) I suggest watching this video! She does a great job of explaining how it works… and it’s good to see someone do it. This is the video I used to learn how to use the iron on adhesive.
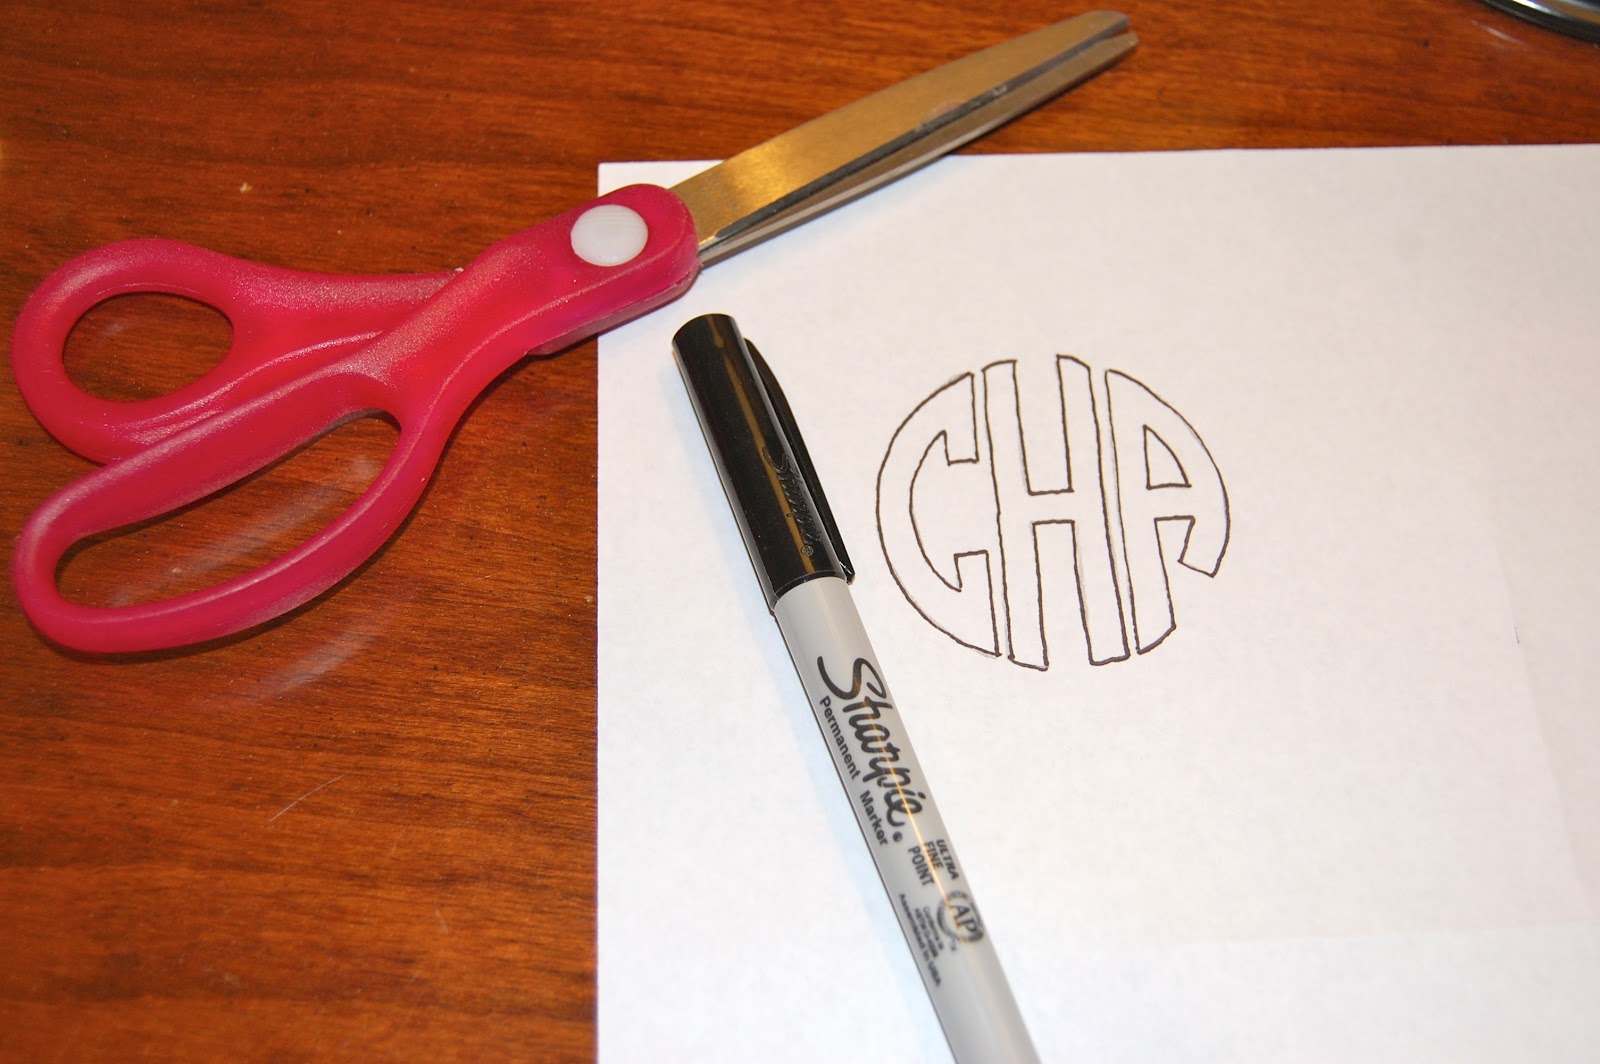
I drew my monogram on a piece of cardstock with a Sharpie. Based on the size of the pocket, I grabbed a mini glass that had a good sized circle. Then, using a ruler, I drew the monogram (first in pencil). I looked off a monogram I had in my room to make the letters look okay. Circle monograms are pretty easy to draw if you trace the circle first! The letters really go right with the edge of the circle, so it’s easy to start with the outside letters and then work on the middle!
I also made a template of the pocket shape using the same technique.
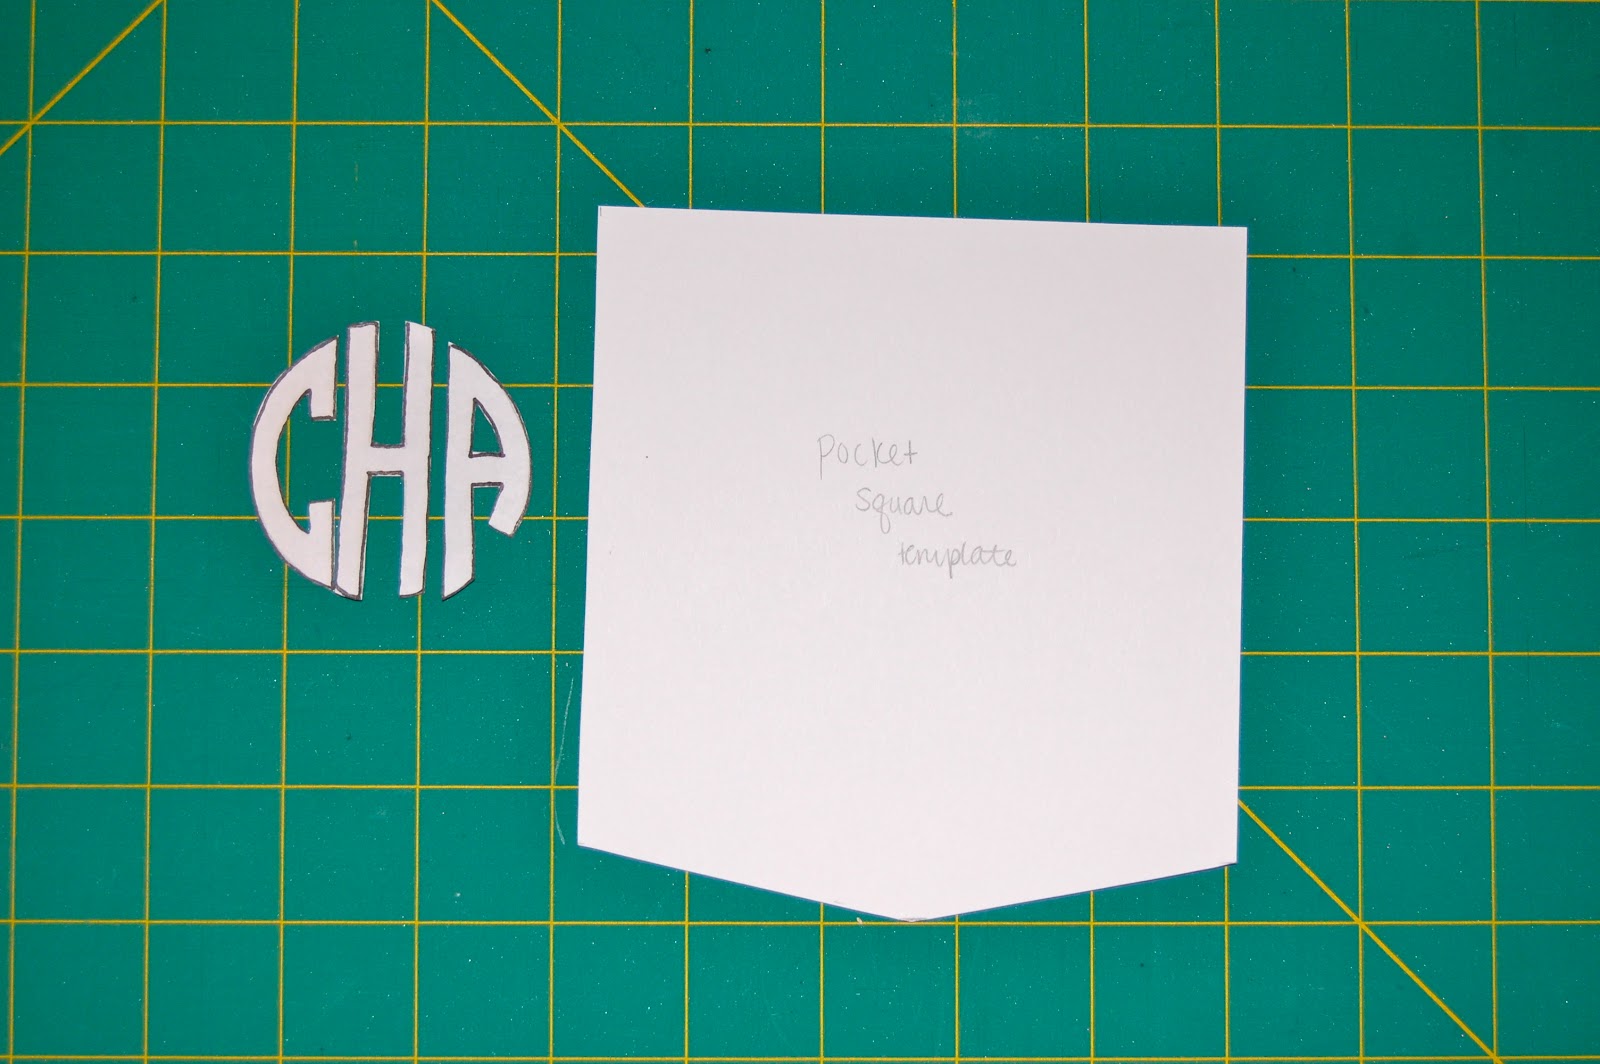
I cut out the most of the monogram and the pocket with scissors. But I had to use an exacto knife to cut out the inside of the A.
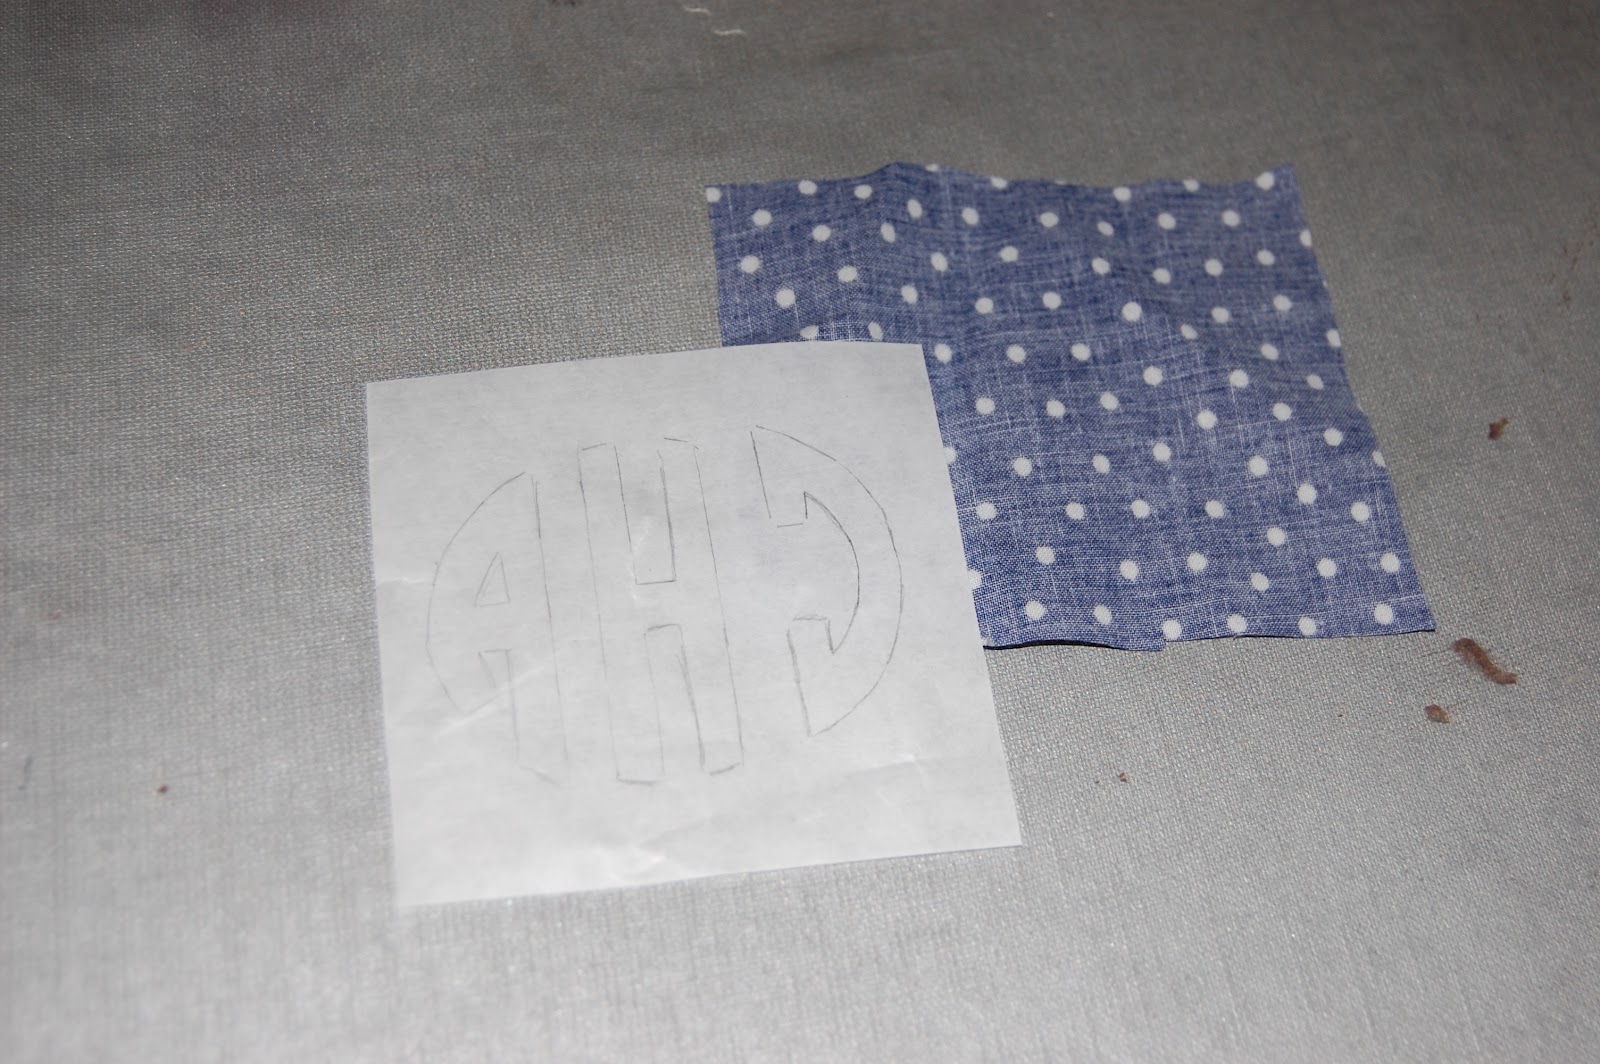
Trace the reverse of the templates on the smooth side of the transfer paper. (The bumpy side is the glue, which will eventually melt with the help of your iron!!!) Cut down the fabric to a good size and trim down the paper. Don’t actually cut the tracing out yet– leave the edge so the glue for sure gets to the edge of your almost-applique!
Here’s how to iron: Place the fabric good-side down on the ironing board. Place the adhesive on the fabric. Ensure that your fabric square is LARGER than the adhesive… otherwise you will end up with a big glue-y mess and a ruined iron!
Complete this for every part. In this case, you’ll need to do this for the pocket fabric and the monogram.
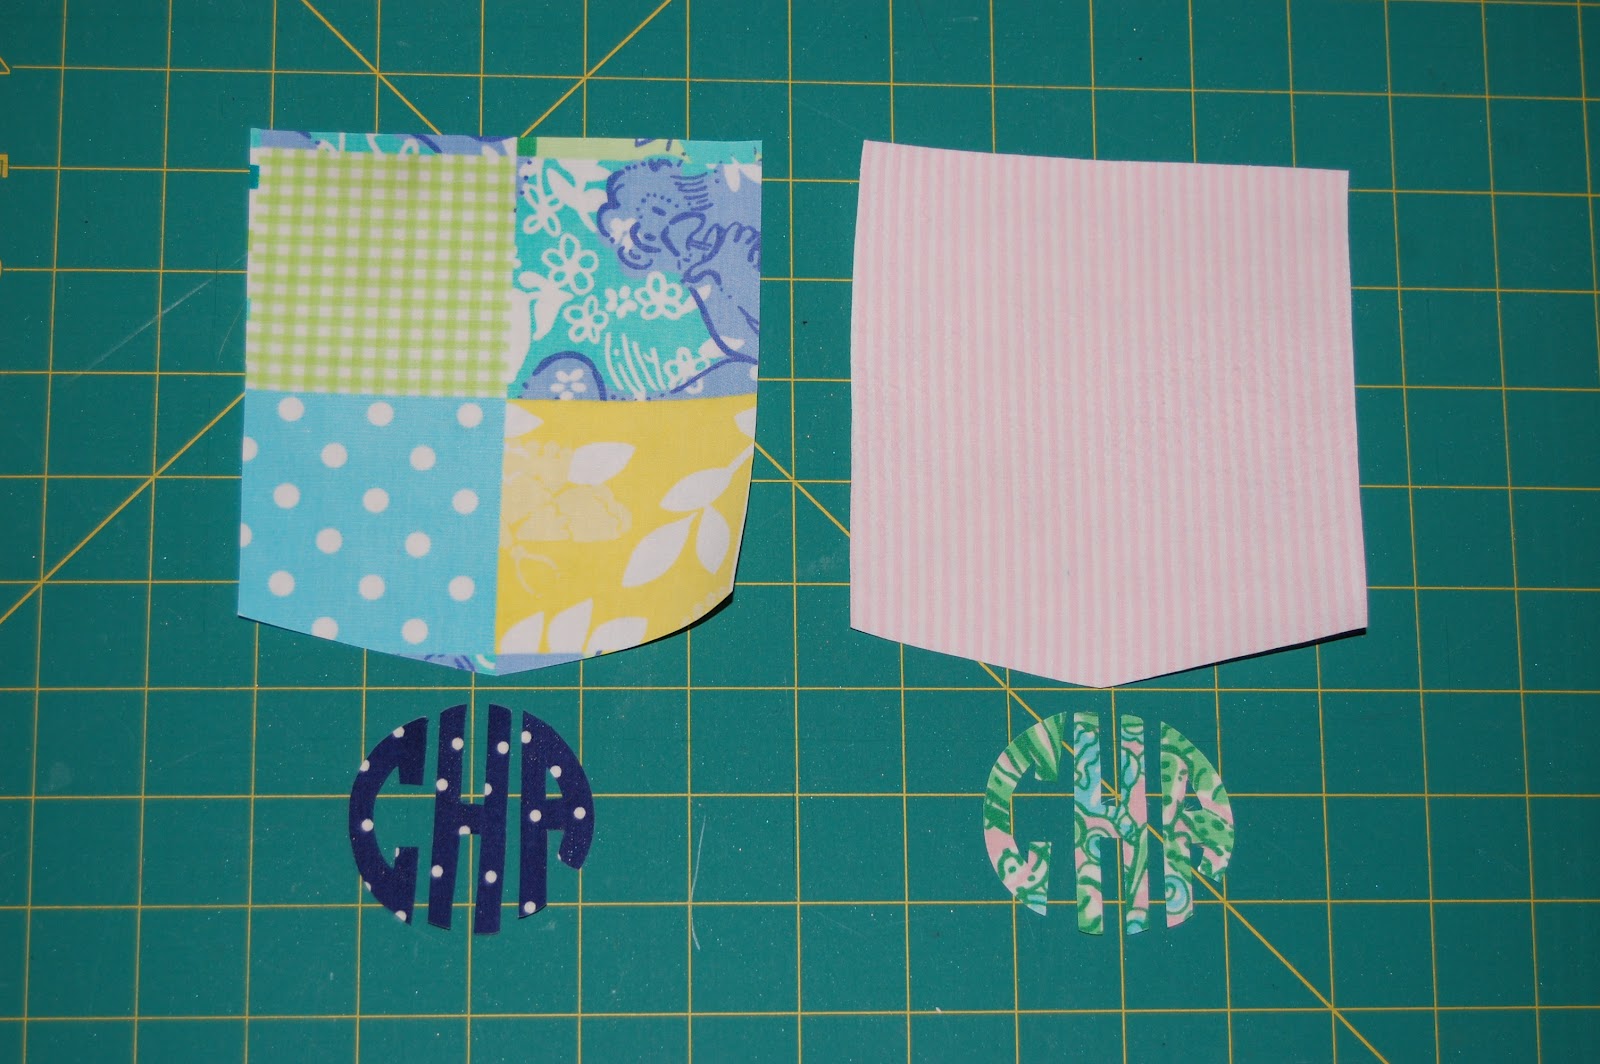
Carefully cut out the monograms. Because you traced on the paper part of the adhesive earlier, it’s super easy to cut the pieces out.
Peel the paper off after they’ve been cut.
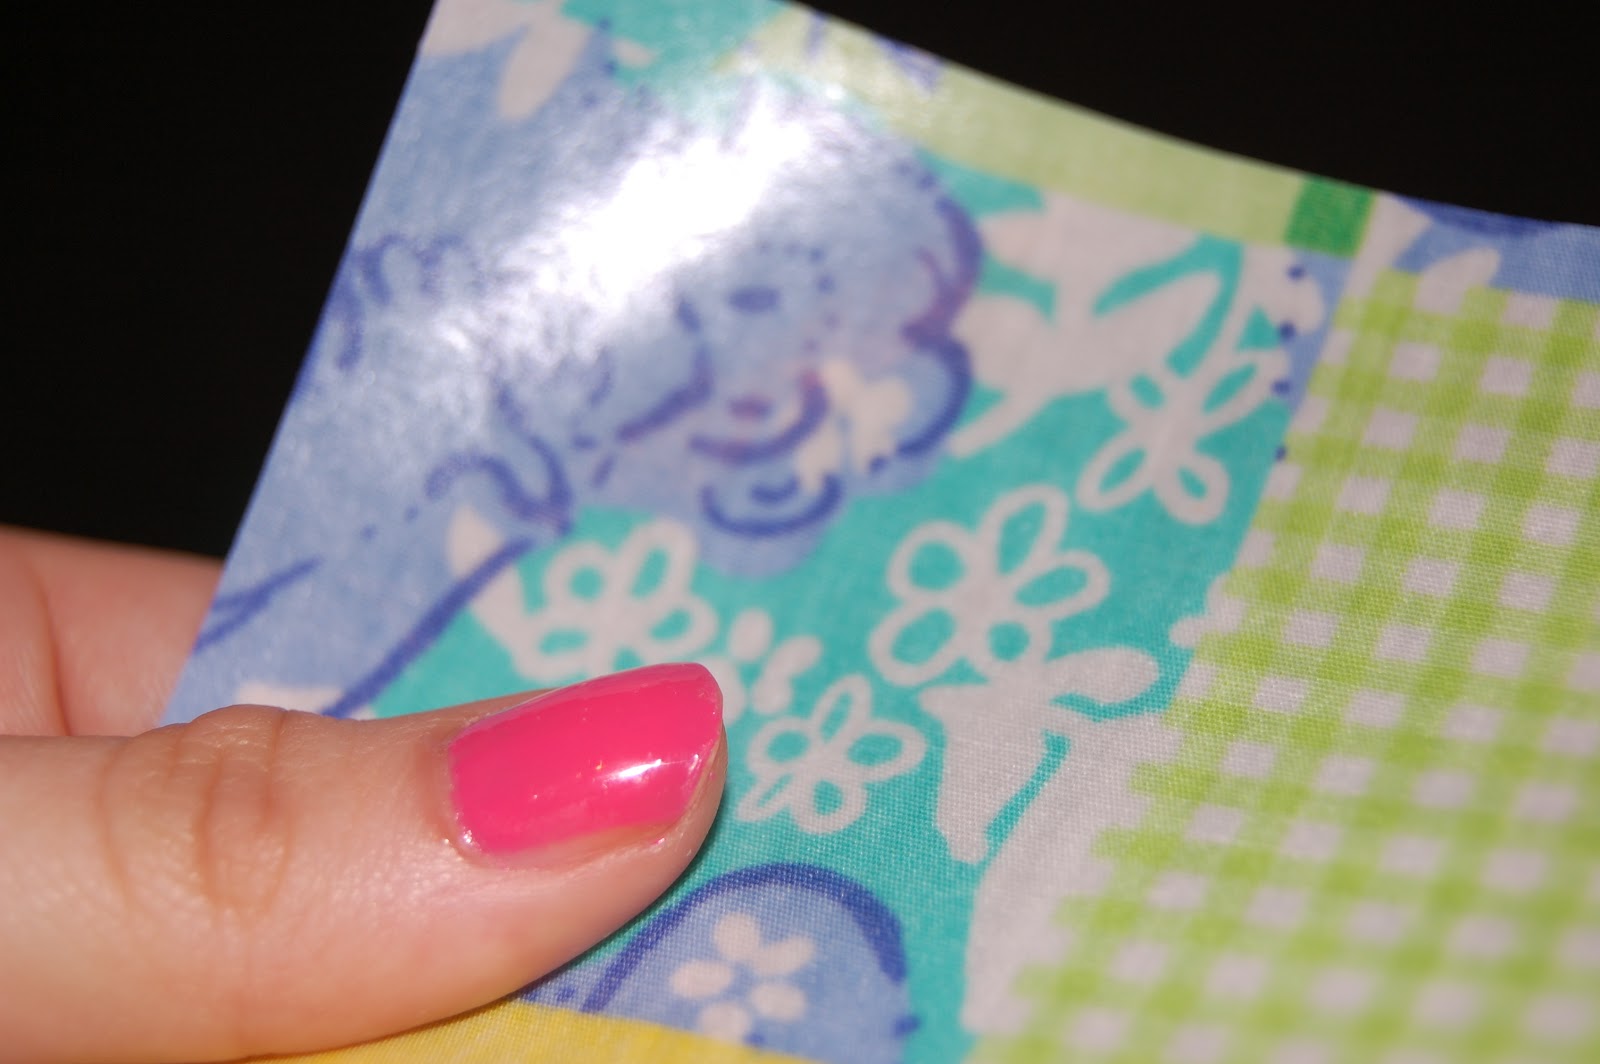
The back of the fabric will now be super shiny! This is the side that gets ironed onto the t-shirt!
Start by ironing on the pocket fabric first. Press super hard and move the iron slowly, continuously pressing firmly!!! It takes a little bit for the pocket to set, but it will… just be patient.
Let the fabric cool.

Start by aligning your middle letter. Iron on using the same process as before. One letter at a time, complete the process for your first and middle initial.
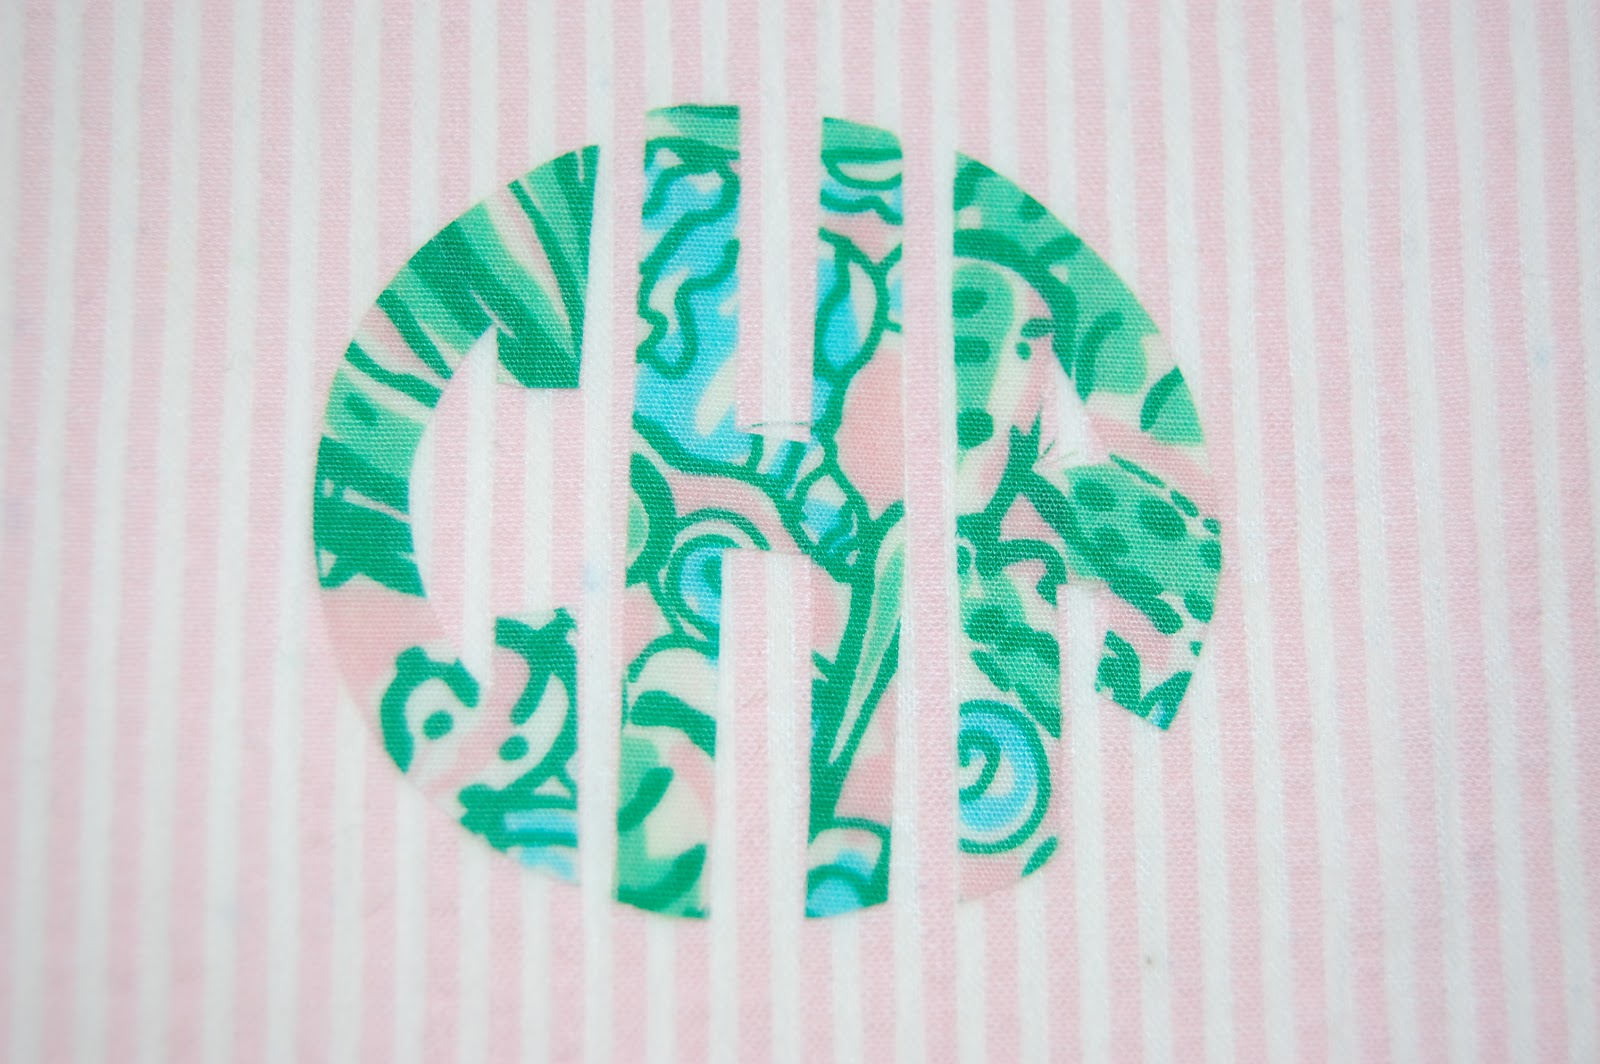
Here’s a close up of the other pocket I did! I made it for a white t-shirt. Pink seersucker fabric and a Lilly Pulitzer monogram!
You should be able to leave the fabric as is after the iron on process. However, I enlisted the help of Soccer Mom to sew the edges of the pocket fabric down for extra reinforcement.
xoxo
PS Here are other projects I’ve (or Soccer Mom has) completed using Lilly fabric:
My mom also made a Lilly stocking, but apparently I’ve never blogged about that!


Where do you get your Lilly fabric?
You must know by now, your article goes to the nitty-gritty of the subject. Your clarity leaHayCompras
ves me wanting to know more. Just so you know, i will immediately grab your feed to keep up to date with your online blog. Sounding Out thanks is simply my little
I am totally doing this! Love, love, love!
LDK
Thanks for providing recent updates regarding the concern, I look forward to read more.
bsn pins
omgosh so adorable!!
When virtue and modesty enlighten her charms, the lustre of a beautiful woman is brighter than the stars of heaven, and the influence of her power it is in vain to resist.
valium online
It turned out really nicely!
CP, that is too cute! Great job with the monogram, I can never draw mine right! Thnks for the DIY, I'll have to try this soon 🙂
I recently bought a monogrammed t-shirt. This is wayy cuter than mine. Mine is just a simple heat-pressed monogram on a t-shirt. Yours looks great Carly!
Your shirt is gorgeous! I love throwing on a simply tee to run errands, study, or babysit, but this idea takes a simple tee to a whole new level. I will definitely be trying this!
What s great idea!
Obsessed at the the fact that we have the same monogram. If you're ever wanting to get rid of something monogrammed, let me know! 🙂
Super cute DIY.
Love this DIY!!!!
southerngirllivingthecitydream.blogspot.com
I am literally obsessed with this. I already bought everything for it and am making like 6 shirts!
Oh my gosh, that is so cute! So much cheaper, too. 🙂
Wow this is so creative! The final product turned out great!
katiesbliss.com
You are seriously so awesome. I wish I was that pro-active about DIY-ing! Totally going to attempt this for my first "craft" at some point! 🙂
-Lanie @SouthernPreppyChic.blogspot.com
I want to do this and make throw pillows with pockets! Great inspiration! 🙂
I love this! I made 2 but instead of using the adhesive to attach fabric to an existing pocket, I just sewed a pocket onto a plain t and used the iron-on for my monogram! So cute 🙂
I love this! What a great project 🙂
officially doing this! making one for both of my sisters and me. so cute!!
I can not for the life of me get the pockets to attach to the t-shirts! Any pointers?
The connections that you make early in your career will take you far. After 20 years it is still true for me. This has been true regarding companies I worked for and those I worked with. All you have written is excellent advice.
valium online cheap
hi,it looks very well.theT-Shirt,I like it ~
I have always loved the ones from The Frat Collection! This was a wonderful idea. Thanks so much for sharing your tutorial.
Shut up, you are too talented!
Thank you for this post. Thats all I are able to say. You most absolutely have built this blog website into something speciel. You clearly know what you are working on, youve insured so many corners.thanks
Post Free Ads
I just love the idea that you have adopted.Good work.
http://www.apparelnbags.com/mens-t-shirt-cotton.htm
you did such a good job explaining it it seems simple enough! FYI Lily Pulitzer has an AMAZING perfume called wink. I can't go anywhere w/out someone complimenting it!
you did such a good job explaining it it seems simple enough! FYI Lily Pulitzer has an AMAZING perfume called wink. I can't go anywhere w/out someone complimenting it!
It feels awe-inspiring to read such informative and distinctive articles on your websites.
bubblegum casting
Your writers have capability to make understand the users, great stuff you have provided to us.
bubblegum casting reviews
Very advisory and effective collection of stuff.
bubblegum casting reviews
I have been dotty by reading your blog because it has a unique data.
Home Page
The information you have given in the blog really marvelous and more interesting. cash loans online
Your blogs and accretion attracts me to come back once more on your site.
click here
Hello there, I do think your website could possibly be having browser compatibility problems. When I take a look at your web site in Safari, it looks fine however, when opening in Internet Explorer, it has some overlapping issues. I merely wanted to provide you with a quick heads up! Aside from that, wonderful website! Roblox Cheats
roblox cheat engine
http://onlinegamescheats.info/roblox-cheats/
I think this is thoroughly unparalleled.phlebotomy program
You fully match our expectation and the selection of our data.
best panasonic shaver review
Hi guys, I am again at the same place, and reading this post, it is also a pleasurable article, so stick with it.Diet
congratulations guys, quality information you have given!!! increase facebook likes
As like your site is informative I think you must post the articles regularly so that we can get many benefits of learning through your efforts.
vivint security review
Finally I’ve found your blog, awesome way of explaining each and everything really.the credit people reviews
Your contents is really forcing out your readers to give the nice remarks.
vivint security review
I truly get pleasure from while I read your blogs and its content. best Braun shaver review
Hello! I love your monogrammed t-shirt, I did a test run of this Rarity (to put on a fleece hat) but I ran into some trouble. It seemed as if the pattern shifted (the body outline) and the mane/tail had issues.
Now you have activated my curiosity towards this embroidery thing again,
And I am certainly going to travel a lot these next few months, so perhaps it could be nice to bring something other than that darn work computer 😉
*more thinking*
Thank you for a lovely time
Great blog post! I don’t understand how long it will require me to obtain through all of them! How to burn belly fat
I was searching for decisive information on this topic. The information you have provided in the blog is really important.
Designer sarees
You guys present there are performing an excellent job.
repair credit
write my essay
These articles have got absolute sense devoid of confusing the readers.
unknown caller
Your dazzling work has won my heart. I’ll come soon to your site with new hope.
Medical Negligence Solicitors
Hi, of course this post is fully fussy and I even have learnt lots of things from it. Thanks.
Totally unique stuff is here really amazing!!!
life & style
Well said John
I found lots of interesting information here.Great work. The post was professionally written and I feel like the author has extensive knowledge in this subject. Nice post.
Pre Marriage Courses
Actually this is quite helpful, I always come up here randomly, but always noticed great thing that make my aim. best security system
This is quite impulsive post, I liked the way you write and explain all the things clearly. Thanks hajj package
It is a very profitable post for me. I've enjoyed reading the post. It is very informative and useful post. I would like to visit the post once more its valuable content.
composiet keukenwerkblad
Whether somebody pursuit of his vital thing, hence he or she desires to be accessible that at length, hence that thing is maintained over here.i live in tennessee and i did a payday advance and cant pay it back
thanks for sharing,very nice information
toko tas wanita online
Online Games Cheats
купить медкнижку без медосмотра – Форма 302 Н, справка москва
why not try this out pirkti aukstos kokybes padirbtus pinigus
веб программы – скрипты рулеток, код майнкрафт
useful source https://1xslots-casino.site